Bakedcake
Vegetating
- User ID
- 3
So mushroom cultivation had piqued my interest after reading some books from Terence & Dennis McKenna, which then lead me to Paul Stamets and his work with mycology and that of the cultivation and identifications of Psilocybin & Psilocin containing fungi.
Mushroom Cultivator - A Practical Guide to Growing Mushrooms at Home - Paul Stamets.pdf
So me being the tight-arse Scottish bastard I am, we went low budget so no pressure cooker, though if you can get one or if you own one use it for the sterilisation process as this will save a lot of contamination problems. So this is for the home cultivator who doesn't want to spend a hell of a lot, has time to kill and wants another hobby to get away from their partner with some additional rewards at the end of it. These techniques can be used or are still an outline of growing the Psilocybe & other varieties of edible/gourmet/medicinal mushrooms. This is was my first time, I am no expert and I made quite a lot of mistakes, because I am impatient and I had not fully done all the research when i began, but hey we still got something to grow and in no more than 5 weeks - Where's your fast autos now? Jokes
Jokes
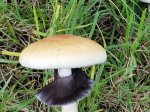
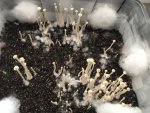
This was my first flush of some Panaeolus Cyanescens Alabama (Variety of the Blue Meanies) not much but they are something
So where do you begin, where does the journey start. Well like any reputable person of society you just look in the far reaches of the internet no doubt to find the supplier. Most places will advise these products are for microscopy use only. That's cool just roll with it like Canna seeds as souvenirs
Personally I found mine through a subreddit, you can find vendors that are local or will ship worldwide. My example it came from Europe and cost me no more than a 10 Euro Amazon Gift Card. The people are so generous i even got a second print for free of another species. So this leads into the first part Spore Prints, Spore Syringes, Liquid Culture etc.
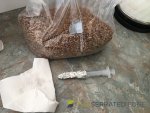
If you are shipping them internationally i would prefer to lean the spore print side for ease of getting in the country, if there is a vendor local to your area then go the liquid culture or spore syringe as this saves time with going through agar. Again though we don't want to spend money and was all for the learning experience so I got spore prints. One of the common Psilocybe Cubensis (Golden Teachers) which i still haven't had luck growing yet, but i had luck with the Pan. Cyan. above.
So I started some new spore germination on the Golden Teachers this weekend and we will see if we can make a proper poor man guide without it going to shit.
The process I will be going through is Agar - making Nutrient Enriched Agar and getting the spores on them, Sectoring a strong candidate, Grain Spawn, monotub colonisation and casing to fruit.
For making agar which will allow the spores to germinate and then grow into their mycelium body you will need a few following items -
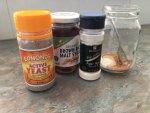
For my agar I always make too much but that's no worries haha, so in a 500ml jar I add teaspoon of Agar-Agar Powder, 1 1/2 teaspoon of Malt Extract Syrup in my case and a teaspoon of dry yeast. Now we add the water and the lid and give it a shake.
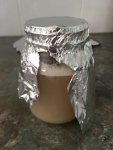
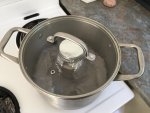
Now turn the lid half crank open, add wrap of tinfoil. Have a pot large enough to fit the jar in it with a lid on. I usually put a tea towel on the bottom of my pot to stop the glass directly touching the bottom. Fill the pot with water half way up the jar, bring it to a boil and allow it to boil for 30-45mins. This should sterilise the Agar before being poured and also to boil the liquid which is needed for it to set. Once this has done, leave the jar to cool until warm enough to handle. Do not be a high cunt and forget or else it will go jelly in the jar once it drops below 30c i think.
Once this is done you are ready to pour your plates, with your Rubbing alcohol spray down the area where you will be doing the pouring, make sure no unnecessary wind drafts are coming through. There is millions of them in the air and the last thing you want is contaminated plates. If you want to spend money you can get flow hoods and Still Air Boxes (SAB) or build one, which will mitigate the risk of contamination.
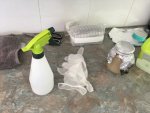
Once your area is clean your gloved up, get your dish of choice to pour into. If using baby jars or another common household item you can steam sterilise these with the agar process if you have room. I chose to get the pre-sterlised plastic petri dishes from a local science shop. Now make sure you know which way they are sitting and they are in an easy to grab angle as you want to open, pour and close as fast as possible. I fill my dishes a little over halfway. Leave these to sit until set.
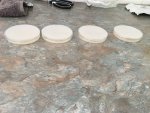
Now when the agar has set you can get some spores on there. With the spore print you obtained you can now sterlise your station up again and grab the print and scalpel.
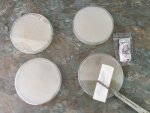
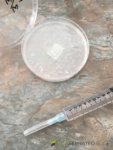
Now you are wanting to scrape a little of the print with your scalpel and then flake them into your dishes, again try do this as fast as possible if not working in a sealed environment.
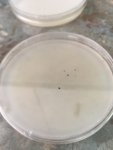
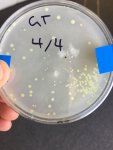
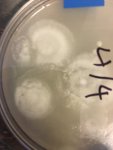
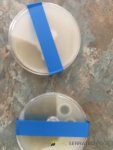
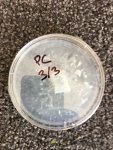
Now seal with tape, mark them dates etc. and stack them in a suitable place anywhere warm around the 25-28c. I like to stack the lid side down, this just stops condensation of the top of the dishes dripping back down onto them.
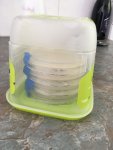
So now we wait for the next step. More to come and I shall put up a quick build on a monotub in the next day or so
Mushroom Cultivator - A Practical Guide to Growing Mushrooms at Home - Paul Stamets.pdf
So me being the tight-arse Scottish bastard I am, we went low budget so no pressure cooker, though if you can get one or if you own one use it for the sterilisation process as this will save a lot of contamination problems. So this is for the home cultivator who doesn't want to spend a hell of a lot, has time to kill and wants another hobby to get away from their partner with some additional rewards at the end of it. These techniques can be used or are still an outline of growing the Psilocybe & other varieties of edible/gourmet/medicinal mushrooms. This is was my first time, I am no expert and I made quite a lot of mistakes, because I am impatient and I had not fully done all the research when i began, but hey we still got something to grow and in no more than 5 weeks - Where's your fast autos now?
This was my first flush of some Panaeolus Cyanescens Alabama (Variety of the Blue Meanies) not much but they are something

So where do you begin, where does the journey start. Well like any reputable person of society you just look in the far reaches of the internet no doubt to find the supplier. Most places will advise these products are for microscopy use only. That's cool just roll with it like Canna seeds as souvenirs
Personally I found mine through a subreddit, you can find vendors that are local or will ship worldwide. My example it came from Europe and cost me no more than a 10 Euro Amazon Gift Card. The people are so generous i even got a second print for free of another species. So this leads into the first part Spore Prints, Spore Syringes, Liquid Culture etc.
If you are shipping them internationally i would prefer to lean the spore print side for ease of getting in the country, if there is a vendor local to your area then go the liquid culture or spore syringe as this saves time with going through agar. Again though we don't want to spend money and was all for the learning experience so I got spore prints. One of the common Psilocybe Cubensis (Golden Teachers) which i still haven't had luck growing yet, but i had luck with the Pan. Cyan. above.
So I started some new spore germination on the Golden Teachers this weekend and we will see if we can make a proper poor man guide without it going to shit.
The process I will be going through is Agar - making Nutrient Enriched Agar and getting the spores on them, Sectoring a strong candidate, Grain Spawn, monotub colonisation and casing to fruit.
For making agar which will allow the spores to germinate and then grow into their mycelium body you will need a few following items -
- Agar-Agar Powder - this is a powder which become gelatinous on cooling similar to gelatine.
- Malt Extract Powder or Syrup
- Dry Yeast
- Water
- Jar
- Tin Foil
- Pot large enough for steam sterilisation
- Baby Jars, Petri Dishes to pour the dish into
- Gloves
- Rubbing alcohol in a mister - or if you have Isopropyl Alcohol 99% lying around dilute that down to a 70% rate with water.
- Scalpel/Razor
For my agar I always make too much but that's no worries haha, so in a 500ml jar I add teaspoon of Agar-Agar Powder, 1 1/2 teaspoon of Malt Extract Syrup in my case and a teaspoon of dry yeast. Now we add the water and the lid and give it a shake.


Now turn the lid half crank open, add wrap of tinfoil. Have a pot large enough to fit the jar in it with a lid on. I usually put a tea towel on the bottom of my pot to stop the glass directly touching the bottom. Fill the pot with water half way up the jar, bring it to a boil and allow it to boil for 30-45mins. This should sterilise the Agar before being poured and also to boil the liquid which is needed for it to set. Once this has done, leave the jar to cool until warm enough to handle. Do not be a high cunt and forget or else it will go jelly in the jar once it drops below 30c i think.

Once this is done you are ready to pour your plates, with your Rubbing alcohol spray down the area where you will be doing the pouring, make sure no unnecessary wind drafts are coming through. There is millions of them in the air and the last thing you want is contaminated plates. If you want to spend money you can get flow hoods and Still Air Boxes (SAB) or build one, which will mitigate the risk of contamination.

Once your area is clean your gloved up, get your dish of choice to pour into. If using baby jars or another common household item you can steam sterilise these with the agar process if you have room. I chose to get the pre-sterlised plastic petri dishes from a local science shop. Now make sure you know which way they are sitting and they are in an easy to grab angle as you want to open, pour and close as fast as possible. I fill my dishes a little over halfway. Leave these to sit until set.

Now when the agar has set you can get some spores on there. With the spore print you obtained you can now sterlise your station up again and grab the print and scalpel.

Now you are wanting to scrape a little of the print with your scalpel and then flake them into your dishes, again try do this as fast as possible if not working in a sealed environment.

Now seal with tape, mark them dates etc. and stack them in a suitable place anywhere warm around the 25-28c. I like to stack the lid side down, this just stops condensation of the top of the dishes dripping back down onto them.

So now we wait for the next step. More to come and I shall put up a quick build on a monotub in the next day or so


